Happy Sunday everyone! I'm having one of those weekends that feels like longer than two days, so I'm very happy :) I was intending to post yesterday but I went to the park instead - got to make the most of British summer while it lasts (which could well only be a day or two).
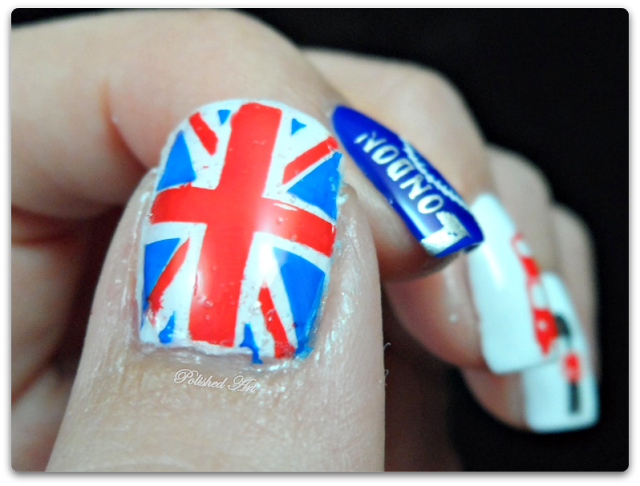
And on the subject of British - today's nail art is London-themed. I used the MoYou London Tourist Collection 01 plate, which I bought ages ago because it looked awesome but have only just got round to using.
For stamping I used Konad stamping polishes in white, red and blue, along with Barry M Black and Silver Foil. The polishes used for the base colours are Barry M Cotton, Nails Inc Southwark, Ciate Boudoir and Barry M Red Glitter.
So this isn't a particularly coherent look, and I'm not really happy with how it turned out. But I did use a few new techniques! So for the little Queen's Guards I attempted two colour stamping. The Union Flag stamp that I used on my thumb is all just one stamp, but I wanted to use both the red and blue. So I made two decals - I stamped in each colour then removed the bits of the image I didn't want from the stamper with a toothpick, then made a decal by applying top coat over the image on the stamper and letting it dry. I think this shrunk slightly though so it doesn't quite fit my nail, but we'll just pretend that's the look I was going for.
I also didn't intend to stamp 'London' on my index finger, but my London Eye ended up so off centre I had to add something else to make it look intentional. Think my stamping still needs a bit of work!
If you've used this plate, I'd love to see what you've come up with :)
Sunday, 28 June 2015
Tuesday, 23 June 2015
Quick Swatch: Jessica Ruffled Bottoms
A long long time ago, I can still remember...I was looking for my ideal purple polish. My auntie suggested I try Jessica Ruffled Bottoms, and I've been in love ever since. As an expression of my love for this polish, I thought it was time it had it's own blog post.
It matches my phone and kindle and camera and laptop and just generally makes me happy. I heart purple.
Great formula as well. This polish can do no wrong.
What's your go to purple creme?
It matches my phone and kindle and camera and laptop and just generally makes me happy. I heart purple.
Great formula as well. This polish can do no wrong.
What's your go to purple creme?
Sunday, 21 June 2015
Daisy Nails
Happy Sunday! I do love Sundays, it's just a shame they're always followed by Mondays. Never mind! Plenty of hours of laziness left yet. Think I'm going to have a binge session of The Box whilst drinking unhealthy amounts of coffee.
So anyway, a couple of weeks ago I was sent some lovely summery colours to try from the SEVENTEEN Gel Colours range. You can see my swatches and what I thought of them here. These colours just screamed daisy nail art to me, so that's what I have for you today :)
I used Summer Sling for the base (which is a little warmer than it appears here - stupid camera) and then painted the petals on with White Lady and a small nail art brush, and used a dotting tool to add the dots of Lemon Drop.
Very simple and very summery :)
What are you getting up to with your Sunday?
Friday, 19 June 2015
Geometrically Pinking
Hellooooo!
So this week has been busy! I had my MSc viva on Tuesday, and so my Master's is now done! Had an email today to let us know we all passed (always a relief!), but have to wait until July to find out how we did. Now just all the professional exams and assessments to do...ugh.
A few weeks ago I was desperately searching for a dress for a black tie event. It was TK Maxx that came through for me in the end, and while I was there it seemed sensible to treat myself to the China Glaze Road Trip mini collection. This is Pinking Out The Window.
This is a weird polish - in a good way. Sometimes it's really pink, and then sometimes it's far more peachy. And occasionally it decide to be neon. As you do.
After a couple of days wear, I decided to add a bit of a gold geometric pattern.
I didn't actually mean to paint the bottom part of my index finger nail, but I was watching TV and obviously not paying enough attention...
This design was created using striping tape and Avon Golden Vision.
Please excuse the dint in my thumb!
Have you tried any of the China Glaze Road Trip collection?
Saturday, 13 June 2015
SEVENTEEN Gel Colour
Hello my lovely readers :)
I was very excited to receive an email a couple of weeks ago from Boots asking me if I'd like to try out some of their new Seventeen Gel Colours. Umm...yes please! I was sent the four colours below to show you (plus an adorable little gift bag):
To clairfy, these are gel effect polishes, so just apply like normal polishes - no curing or any of that malarkey.
All swatches are shown without top coat. For some of these I used three coats to get a perfect macro coverage, but I think you'd probably get away with 2 with careful application.
First up, Mint Cooler.
This is a gorgeous bright mint colour, absolutely perfect for summer.
I've used three coats here.
Next, Summer Sling.
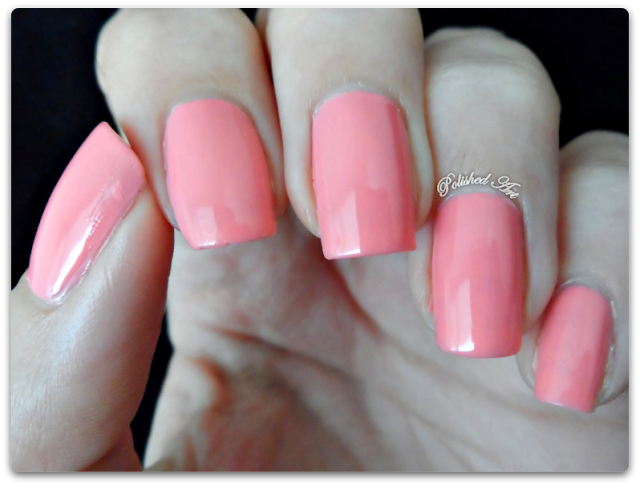
My camera has something against purples, but I've just about managed to get this one colour accurate! More so in the top image. This is a lovely warm, not-quite-pastel shade.
Look at this beauty! No messing around with hints of grey or cream, this is a true, super-bright white. This'll make a great base for nail art (bye bye Barry M Matt White...).
Again, this one was another three coater for me.
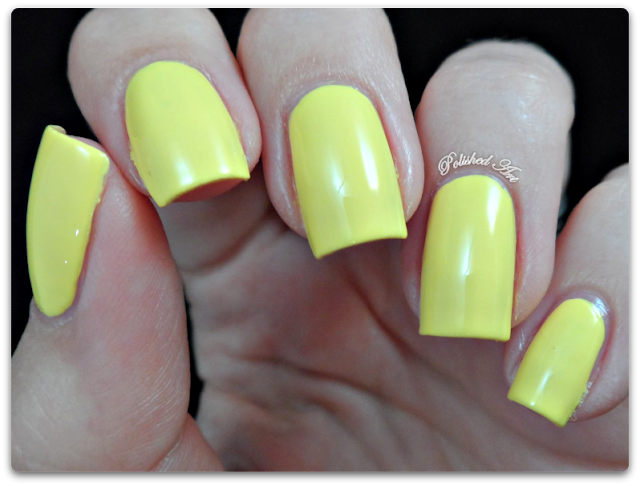
And lastly, my favourite of the four - Lemon Drop.
This is a stunning bright lemon yellow. Absolutely perfect for summer (even if it doesn't look like we're ever going to get a summer in the UK this year) and look at that coverage! I don't own a single other yellow polish that gives me coverage like that without white undies. If you're on the market for a yellow, I would absolutely recommend this one.
All in all, I really like these polishes and will certainly have a nose at what other colours are available next time I'm in town, and at £3.99 a pop they're great value. You can see the full collection here.
And lastly! These polishes claim 8 day wear, so obviously I have to test that... I've used three coats of Mint Cooler with my usual base and top coats (OPI Natural Nail Base Coat and Seche Vite). I'm currently on day 5 and still going strong, with no chips or tip wear at all, which is really good going for me! I'll update this post when I reach day 8 :) And watch this space for some nail art using these polishes...
I hope you're all having a great weekend!
UPDATE:
So, it's day 8, and the verdict is...
Not bad? These chips happened yesterday, so I got 7 days chip free wear. I normally get about 3 days if I've been super super careful with application, so this is great for me. The chips are in a bit of a funny place, but I think it's just cracked where my nails bend when I bash them against things. You'll notice the other nails don't even have a hint of tip wear, which is amazing. So possibly with shorter nails you might get even more than 7 days out of it. If you can handle having the same colour nails for that long...I know I'm itching to do some nail art!
I was very excited to receive an email a couple of weeks ago from Boots asking me if I'd like to try out some of their new Seventeen Gel Colours. Umm...yes please! I was sent the four colours below to show you (plus an adorable little gift bag):
To clairfy, these are gel effect polishes, so just apply like normal polishes - no curing or any of that malarkey.
All swatches are shown without top coat. For some of these I used three coats to get a perfect macro coverage, but I think you'd probably get away with 2 with careful application.
First up, Mint Cooler.
This is a gorgeous bright mint colour, absolutely perfect for summer.
I've used three coats here.
Next, Summer Sling.
My camera has something against purples, but I've just about managed to get this one colour accurate! More so in the top image. This is a lovely warm, not-quite-pastel shade.
This one only needed 2 coats for a flawless finish.
Up third is White Lady.
Look at this beauty! No messing around with hints of grey or cream, this is a true, super-bright white. This'll make a great base for nail art (bye bye Barry M Matt White...).
Again, this one was another three coater for me.
And lastly, my favourite of the four - Lemon Drop.
This is a stunning bright lemon yellow. Absolutely perfect for summer (even if it doesn't look like we're ever going to get a summer in the UK this year) and look at that coverage! I don't own a single other yellow polish that gives me coverage like that without white undies. If you're on the market for a yellow, I would absolutely recommend this one.
Again, I used 3 coats.
You can see from these swatches that all of these polishes have a lovely glossy finish - and these are all taken in a lightbox, which dulls the shine a little. The formula on these was good, slightly thick but in a good way that meant there was no pooling. The brush, as you can see below, is wide and flat, which is my preferred type of brush. Although not as wide as the Rimmel brushes which are wider than my little finger nails... It has a curved-shape to end that meant it was easy to get a clean cuticle line without any clean-up.
All in all, I really like these polishes and will certainly have a nose at what other colours are available next time I'm in town, and at £3.99 a pop they're great value. You can see the full collection here.
And lastly! These polishes claim 8 day wear, so obviously I have to test that... I've used three coats of Mint Cooler with my usual base and top coats (OPI Natural Nail Base Coat and Seche Vite). I'm currently on day 5 and still going strong, with no chips or tip wear at all, which is really good going for me! I'll update this post when I reach day 8 :) And watch this space for some nail art using these polishes...
I hope you're all having a great weekend!
UPDATE:
So, it's day 8, and the verdict is...
Not bad? These chips happened yesterday, so I got 7 days chip free wear. I normally get about 3 days if I've been super super careful with application, so this is great for me. The chips are in a bit of a funny place, but I think it's just cracked where my nails bend when I bash them against things. You'll notice the other nails don't even have a hint of tip wear, which is amazing. So possibly with shorter nails you might get even more than 7 days out of it. If you can handle having the same colour nails for that long...I know I'm itching to do some nail art!
Wednesday, 10 June 2015
Tiger Feeding
Any post that involves pictures of tigers is good right?
For Christmas, my lovely husband bought me a Big Cat Encounter at Wildlife Heritage Foundation in Kent. WHF is a big cat sanctuary, but run a little differently to a normal zoo - it isn't open to the public other than by booking one of their experiences or on their annual open days. The Big Cat Encounter included a couple of hours seeing all the cats with a keeper for tour guide, plus getting to feed some of the cats (through the fence...I still have all my limbs).
This is Puna. Whilst I obviously love all tigers equally, Puna is like the prettiest tiger ever. Look at her little face! She was a bit scared of John though bless her, although that didn't seem to be an issue when he was offering her chicken...
Anyway, nails. I just did a simple tiger manicure (you can see my tutorial here) using OPI A Roll In The Hague, with some Barry M Matt White sponged on, and a very very old and very very thick black striper pen.
More tigers!
This is Puna's boyfriend (also a big fan of chicken). When we visited, Puna had just had a contraceptive implant so that they can live together <3 They have been a breeding pair previously, but no more babies for the time being!
I like that John looks like he's interviewing him...
I also added a little white nail, striped with China Glaze Call Of The Wild, for Narnia, the lovely white tiger below.
Narnia was the first tiger I fed and I was a little nervous, but she didn't eat my hand so it's all good. It's crazy how much bigger they are up close though, even than they look in these pictures.
We also got to see the beautiful jaguar Athena, the pumas, the pride of white lions, a cheetah called Martin and lots of other tigers and little cats :) And another massive lion who's moving soon so he can have some lady tigers for company. We then spent the afternoon visiting Wildwood, which is like a zoo but for British animals. Far less exotic, and mostly nocturnal. Give me tigers any day...
Sunday, 7 June 2015
Sheer Gradient
Helloooo :) So I survived One Direction! It was quite good fun really and my sister is still in a bit of a daze, so it was worth it. We did somehow find ourselves being shouted at by some crazed Niall fan to help her hold up her sign she'd made though...and she was not a child lol. I'll post a few pictures if my sister ever comes out of her daze long enough to send me them.
Today I just have a very simple gradient to show you using OPI Sheer Tints.
I used a base of Barry M Matt White (I'm on the market for a new white if anyone has any suggestions?). Then I added rough layers of OPI I Can Teal You Like Me. For some reason my camera likes to blend all the layers together, so here's a picture from my phone where the layers show up a bit better:
Lastly, I added some fishy stamping from one of my MoYou plates, using Star Gazer 232.
I'd love some more suggestions for nail art looks to try out with these polishes! Just leave a comment :)
Friday, 5 June 2015
Racing Flags
When I made my (rather undramatic) return to blogging and showed you these nails, I told you that these weren't actually the first nails I did, but the first ones were just too bad to show you after not posting in such a long time. Well, the time has come.
I was struggling for inspiration, so I dug through a load of old stickers and transfers that I bought way back when before I even started this blog. I selected some tip stickers that sort of remind me of racing flags, and decided to pair them with Viva La Nails Creme Brulee.
Here you go...are you ready for it..?
I think I actually would have done a better job if I'd freehanded them, which is saying something... Unfortunately, the stickers weren't quite wide enough for my nails, and something funny happened around the edges of the stickers when I added top coat. I also, somehow, managed to get a load of yellow polish in my hair. So yeah...not my best.
I hope you all have a lovely start to the weekend! I'm back in Wales this weekend, taking my sister to see One Direction...lucky me...
Wednesday, 3 June 2015
Leafy Branch Tutorial
I couldn't work out what this pattern should be called, so I've ended up with leafy branch! Not that it particularly looks like leaves or branches...
This is another really simple nail art look that's super quick to do. You can see some of the ways I've used this pattern by clicking the links below:
This is another really simple nail art look that's super quick to do. You can see some of the ways I've used this pattern by clicking the links below:
For this tutorial, all you'll need is:
- Base colour
- Nail art pen or Sharpie
You can of course use a thin nail art brush and polish rather than a pen. I personally prefer to use a Sharpie - I have the double ended ones and use the thin end.
Here's the step-by-step picture tutorial:
1. Prepare your nail as usual and apply your base colour. Give this plenty of time to dry before you start drawing on it.
2. Use your pen to draw a gently curving line on your nail, starting from any edge. Finish the line off with a little loop.
3. Add more loops, alternating side as you go down the branch.
4. Colour in all your loops.
5. Repeat steps 2-4 until you're happy with the coverage. For some of the spaces, you might just need a little peak of a leaf coming in from the edge, as I've done at the bottom of my nail.
6. Give that plenty of time to dry again (nothing worse than smudged Sharpie!), apply your favourite top coat and you're done!
If you have any tips for how to improve my tutorials or any ideas for tutorials you'd like to see, please post your suggestions in the comments.
Monday, 1 June 2015
Grape Nails
Happy Monday! If there is such a thing (Bank Holiday Mondays I suppose?). I hope your weeks all got off to a good start :)
I said in my last post that I was off wine tasting with some friends this weekend. Unfortunately one of my friends couldn't make it in the end, but we still had a lovely time. And it also meant we ended up rather tiddly because we used her tokens too... If you're near London and haven't been to Vinopolis yet, you should visit. You get a little masterclass in how to taste wine properly and then you're let loose to taste whichever wines you fancy. It's good fun, and we managed to spend four and a half hours in there, so we definitely got our money's worth!
I couldn't really picture how to do wine-themed nails, so I went for some grapes instead!
I used a base of OPI My Vampire Is Buff. I love this for doing nail art on - it's just that bit softer than using a true white.
I then drew some bunches of grapes with a Sharpie (visit my Facebook page to see how this turned out on my right hand...more spirograph than grapes...). Then I just blobbed the colours over the tob of the drawings, and viola.
I used Barry M Spring Green for the leafy bits, and OPI Who The Shrek Are You? and Boutique Lay It Out In Lavender for the grapes. I think this would also look good with foil polish for the grapes?
After wine tasting, we then stuffed our face with pizza/crisps/chocolate etc and watched some Disney films. All in all, an excellent weekend! What did you get up to?
Saturday, 30 May 2015
Sheer Flowers
It's the weeeeeekeeeend! Hurrah! Today is wine tasting day and I have some suitably winey nails that I'll show you in my next post...
Today, however, I have something else for you. If you follow me on Facebook (and if you don't, please do!), you'll know that last weekend I was playing with my OPI Sheer Tints. My husband bought me the mini set for Christmas, and I'm ashamed to say this is the first time they've been out of the box. Although I probably also have dozens of other untrieds, but it's not so obvious when they're not all sitting in a nice box together.
Anyway, here's one of the nail art looks I tried. I want to say this is called a pond manicure..? Please correct me if I'm wrong! Inspired by a manicure I saw on Chalkboard Nails ages ago :)
I used Jessica Ruffled Bottoms for my base colour, then used my Barry M Nail Art Pen in White to draw some flowers. I did two layers of flowers, with a coat of OPI Don't Violet Me Down in between, then topped it off with some dots of Barry M Matt White and one last coat of the sheer tint. I think next time I'd use two coats of the sheer tint between even layer to get a bit more of a contrast between the layers?
Do you have any suggestions for other uses of these polishes? I have a lead lighting manicure planned just as soon as I track down a black stamping polish!
I hope you all have a great weekend :)
Thursday, 28 May 2015
Blue Feather
Hello once again :) It is so nearly Friday and I cannot wait for this week to be over! I STILL have a cold and I'm feeling very fed up, but sadly not ill enough to not go to work :p I'm meeting up with some friends this weekend though, which I'm very excited about. We haven't all gotten together since Christmas :) We're going for a spot of lunch, followed by wine tasting and I imagine it'll all go downhill from there (we once managed to drink a pub dry of prosecco, but I like to think that's because they were poorly stocked...).
Remember that glitter from my last post that I said ended up everywhere? Yep, that's it there on my middle finger. Oops.
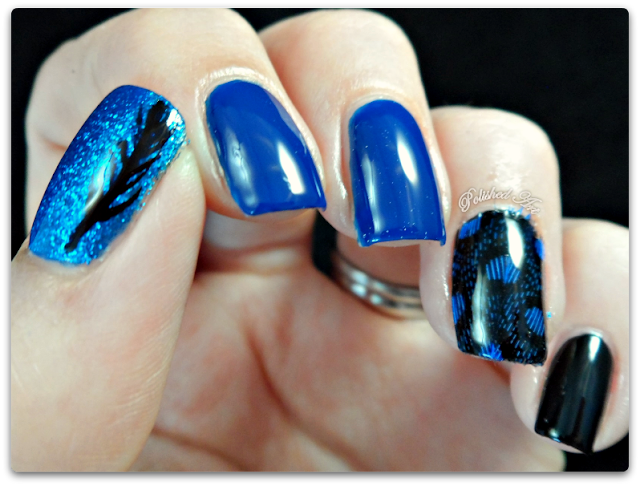
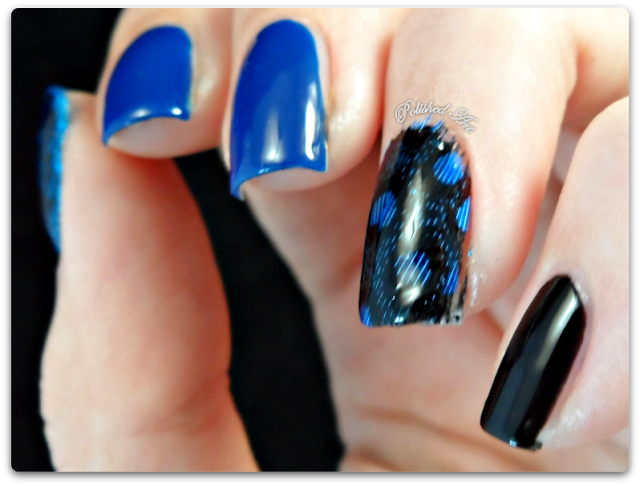
The polish that has been unceremoniously dusted with leftover glitter is China Glaze Manhunt - definitely one of my favourite blues. It's just so darn glassy. On my thumb I added a coat of Barry M Blue Glitter over the top, and then added a little freehand feather just to try and tie the look together a bit.
Anyway, nails. I bought some feathers absolutely ages ago after seeing a great feather nail art tutorial on the Nailasaurus (which you can see here), but they've since sat unused and unloved like so many other nail art supplies... So I decided it was finally time to use them!
When I bought these, for some reason they only had brightly coloured feathers in Hobbycraft. Nothing remotely natural looking. So, I present to you my bright blue feather manicure:
Remember that glitter from my last post that I said ended up everywhere? Yep, that's it there on my middle finger. Oops.
The polish that has been unceremoniously dusted with leftover glitter is China Glaze Manhunt - definitely one of my favourite blues. It's just so darn glassy. On my thumb I added a coat of Barry M Blue Glitter over the top, and then added a little freehand feather just to try and tie the look together a bit.
On my little and ring fingers I used Nails Inc New York Noir - I know it's irrelevant because I top coat everything, but this polish is so amazingly glossy. For the feather accent I pretty much did what's in the Nailasaurus' tutorial except not as well. I decided I didn't want all the thin, sparse bit at the end of the feather on my nail so I just stuck like a middlish part of the feather on my nail and for some reason thought I'd be able to trim around my cuticle with scissors afterwards? I blame my cold...it's affecting my brain. Anyway, as you can see, that didn't work,so don't do that. I did manage to trim it down a bit shorter but I stopped before I started shredding my cuticles, so it isn't as clean a line as I'd like. You live and learn... Also, I added another coat of Seche Vite after filing off the excess feather, just to ensure my ends were wrapped and it was all sealed in.
What do you think? Have you tried using feathers in your nail art before? I'd love to see if you have :)
----------
Tuesday, 26 May 2015
Multiple Blings
Hello! Yes, I'm still alive. I can't believe I haven't posted all year, oops... This year is just flying by though, as if we're in May already. Is this just what happens when you get older? I don't like it at all...
So this bank holiday weekend, my husband was away and I was far too ill to go anywhere further than the sofa, so I cracked out all my nail goodies and did a few manicures :) It's ages since I did anything more than a plain manicure, maybe with a bit of stamping, and my first attempt was...erm...a bit of a disaster. So I thought I wouldn't kick off with that, and instead I'd show you my second (far more successful) attempt.
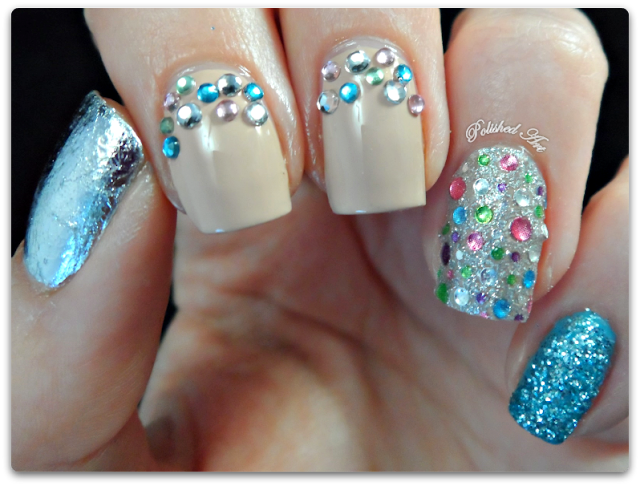
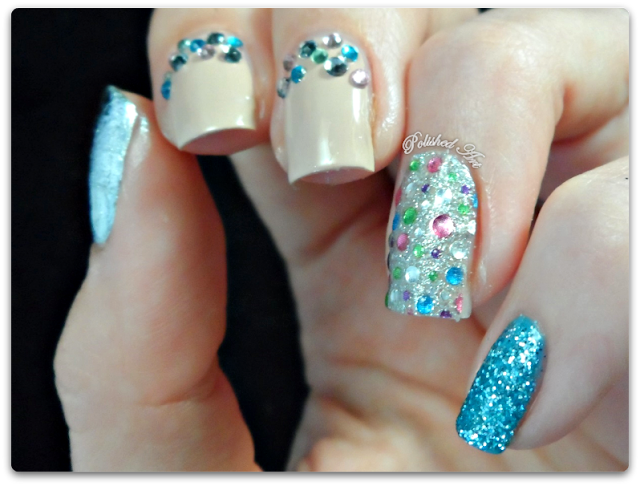
The ring finger is a Kiss Nail Dress that came free with a magazine I bought ages ago. There were 6 designs but only one of each, so totally useless other than for manicures that only survive long enough to be photographed on the blog, but there you go. It applied very easily - it was thick but easily shaped to my nail, and still looked good the next morning, although that probably isn't a very good wear test...
Anyhoo, I then covered my little finger nail with blue glitter from Viva La Nails (you can see my review of this here). It ended up everywhere...I foolishly glittered while all my other nails were still tacky. Rookie mistake.
I used my favourite nude, OPI Don't Pretzel My Buttons, on my index and middle fingers, then added some rhinestones in (slightly) different sizes to match the colours on the Nail Dress. Lastly, on my thumb I used a Ciate nail foil. Despite using Special FX Sealer, it still crinkled. Any tips for a topcoat that works well with foils?
So there it is, my first post of 2015! I hope you like it and I promise to be a better blogger and post more soon :) Let me know what you'd like to see more of: leave me a comment or pop over to my Facebook page. You can also get sneak peaks of upcoming blog posts by following me on Instagram @PolishedArt.
Subscribe to:
Comments (Atom)


