Friday 30 August 2013

A Little Parisian Stamping

Bonjour my lovelies.  TGIF!  Do you have anything nice planned for the weekend?  I'm off to a conference in Brighton on Monday, so me and my OH have decided to make a weekend of it.  Tomorrow night we're staying in a hotel with a jacuzzi in the room...pretty darn swish.

Today I have another product I was sent from Born Pretty Store to show you!  Born Pretty Store has a huge selection of nail art products, including loooaaads of stamping plates, which is what I'm showing you today :)

This plate is QA42, and it has lots of Paris-y images!  There are four different versions of the Eiffel Tower (which is actually the reason I chose it, and I've ended up not using any of those images!), as well as the Moulin Rouge and a couple of airmail-type images.  And Big Ben.  I don't quite understand why that's there, but there we go!


First of all I decided to use the airmail images.  I struggled a little with the image transfer, but no more than I usually do with Konad or MoYou, so I can safely say that's down to operator error.  As I mentioned when I last reviewed a Born Pretty Store plate, they don't have any backing on them.  I read a review once that said the edges were sharp, but I jabbed at myself with it (all in the name of a thorough review!) and it was fine.


I used Barry M Matt White and Bright Red for my base colours.  Then I stamped with Barry M Gold Foil and Konad Red, and added some airmail envelope tipes with my Sharpies.  I probably should've used some tape to make this neater, but you know how I hate tape...

Next I decided to go for the Moulin Rouge image!


When we went to Paris we didn't really have much time to look at the Moulin Rouge...it's in probably the dodgiest area I've ever been, so we took a quick photo and were on our way!  Then we passed a shop that had Eiffel Tower shaped...er...toys in the window.  All very charming.

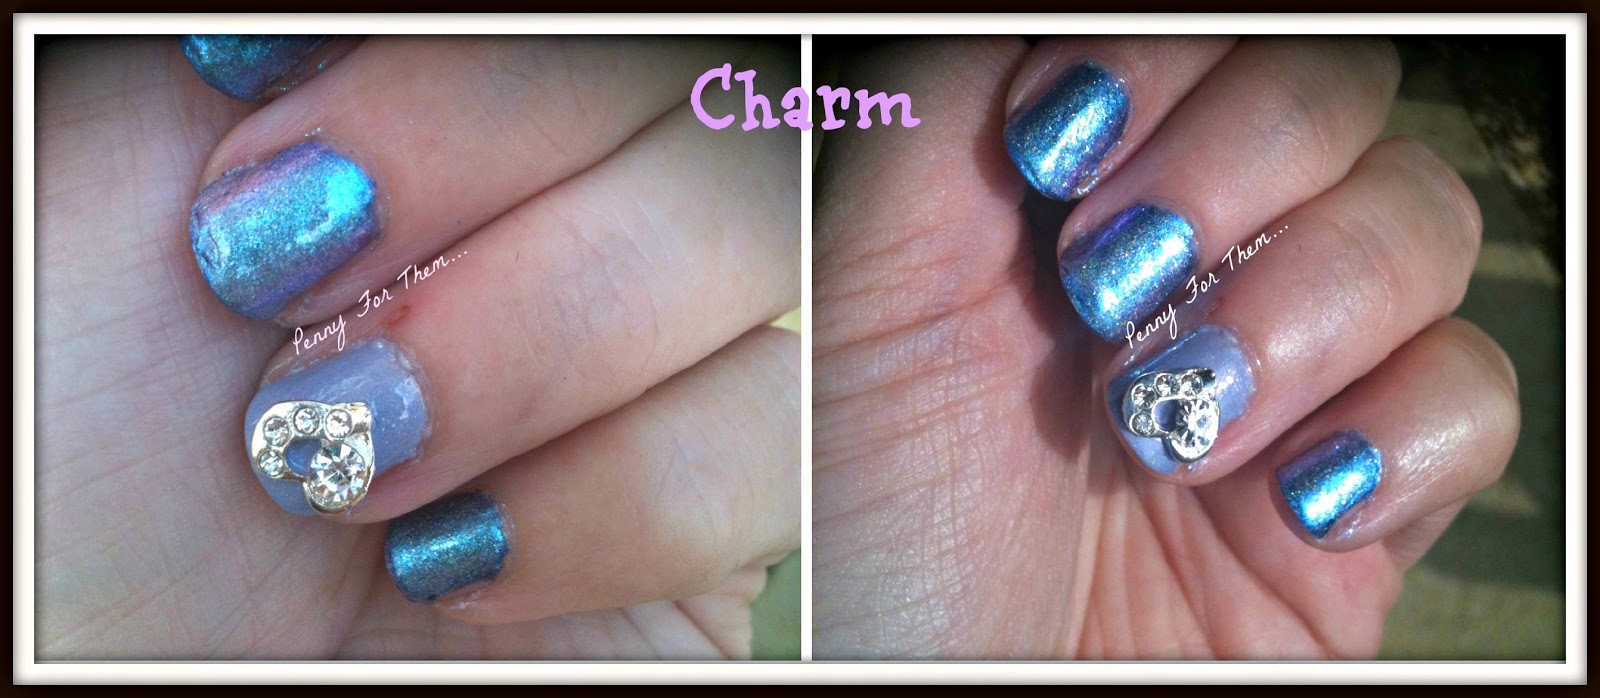
Anyhoo, I used Barry M Black and stamped with Konad Red again, then added a couple of rhinestones to my other nails.

All in all, I think the Born Pretty Store stamping plates are as good a quality as any others, and at £1.29 each they're a lot cheaper than some of the alternatives out there.  You can check out this particular plate here.  Don't forget, shipping is free worldwide, and you can get 10% of any purchase with the code LKL91 (and you can use it as many times as you like!).


I hope you all have a lovely weekend!

Monday 26 August 2013

Guest Post: Cambridge Nails

Aloha!

Speaking of which...my fiance suggested Hawaii for our honeymoon.  Has anyone been there and can recommend it??

Sorry, I'm far too easily distracted by wedding talk!

Today's guest post comes from Emma at Cambridge Nails.  This is a fairly new blog, but my word has Emma posted some stunning manicures in the few months she's been up and running!  I love that her manicures are all so bright.  Check out this Samba Nail Art to see what I'm talking about!

Emma has very sweetly taken inspiration from my Nail Art In A Hurry series for her guest post.

----------

Hi, I'm Emma from Cambridge Nails and I'm very excited to be writing a guest post for Samantha of Polished Art whose blog I really admire. I thought I'd do another post along the lines of Samantha's nail art in a hurry series and show you a couple of things you can do very quickly with dots. The first one I'm going to show you is a very simple design using two contrasting polishes and a single dotting tool.


1) Paint your nails with your base colour, you can use the same colour on all of your nails or mix things up a bit using different colours. The ones above are Lilypad Lacquer Bluebell and Nature Calling, you can immediately move onto the next step without these needing to be dry.

2) Put a blob of your contrasting polish onto a piece of paper and use the bigger end of your dotting tool to make a dot in the middle of your nail at the cuticle end (get enough polish on your tool that you can make the dot without touching your nail with the actual tool, this will make more regular dots) then flip the tool over and use the smaller end to make a second dot directly above the first. If the dots start to become irregular wipe off the end of your dotting tool on a tissue (not cotton wool because it will get tangled round the tool!)

3) Top coat and you're done. 

Variations
1) Do some of your nails with the dots starting from the free edge as in the above photo
2) Use a series of different sizes of dotting tool to make a line of tapering dots all the way up your nail.

But I don't own a dotting tool!
Not a problem, you probably have a pencil, the non writing end of a biro, a hair grip (bobby pin for you Americans), a toothpick, or a steady enough hand just to use the polish brush (if you have wide/long enough nail beds to handle large dots). And if you've read this and now think it would be really cool to own a dotting tool set they're floating around for sale on eBay and amazon and some high street sellers are branching out to nail art sets which include them (I have seen one in H&M).
Which are the best polishes to use?
Polishes which are very opaque will make the strongest dots, however as a dot is usually a fairly large glob of polish almost any polish will work (see the yellow over black below). For an interesting effect use a glitter in a clear base or a base the same colour as the polish to produce a dot which does not have an exact edge. 

You can also make a really quick look by doing a single diagonal line of dots on each nail - I used a toothpick to make the dots in this design.


If you have a little longer you can use a rainbow of polishes over a neutral base to give a very design. I did this on all my nails but you could just do it on one or two for a striking accent nail.


Even this design only took me about 10 minutes to complete all of the dots so it really isn't that time consuming.

If you've enjoyed this post head over to camnails.blogspot.co.uk to see some more of my work and thank you Samantha for having me as a guest poster :)

----------

I am slightly in love with that rainbow dotticure...  I always think I don't have the patience for so many dots (and to be fair actually, I probably don't...can't stuff chocolate in my mouth when my nails are wet) but I may have to give something like this a go!  And I love the simplicity of that two dot manicure - would look really sophisticated :)

Thank you again Emma!

If you like what you see, here are all the ways you can see more of Emma's work:

Twitter (@cambridge_nails)

Sunday 25 August 2013

Guest Posts at Ithinity Beauty and Seriously Swatched

As I said, I've been a busy bee guest posting!  Pop on over to Ithinity Beauty and Seriously Swatched to see my posts!

Friday 23 August 2013

Prairie Charms Project Blogger

Evening ladies, are you all enjoying the start of your weekend?

I was recently contacted by Prairie Charms on Twitter asking if I wanted to take part in Project Blogger.  Prairie Charms make really cute, unique pieces of jewellery, including headbands and the like.  All very cute so do check them out.  And they'll also make custom products if you've got something in particular in mind that you'd like!

Also, 10% of all their profits go to Great Ormond Street Hospital, so you can do a good deed while you shop :p

Anyhoo, what does Project Blogger involve?  Well, they offered all participating blogs a 50% discount code to purchase some products to include in blog posts.  This post then serves as your entry into their competition to win the opportunity to design a custom product to be sold on their website!  As well as that, you get a discount code to share with all your readers.  Happy days!  So here's my attempt at saving all you ladies some money!

I chose to buy a couple of bracelets, and today I'm showing you this Sadia Bracelet.  I don't wear a lot of jewelry (apart from my engagement ring of course!), but when I do I tend to go for bracelets :)

prairie-charms-barry-m-nail-art-spotted

The bracelet is made up of these lovely marble effect beads, which I attempted to recreate on my nails!  I used the DIY spotted technique.  Well, I attempted to use this technique.  Instead of doing to nice spotty thing, it just sort of split up and clumped together.  I'm pretty pleased with how my middle finger turned out anyway, but my index finger's a bit of a disaster...  Any tips?

prairie-charms-barry-m-nail-art-spotted

For the marbles nails I used Barry M Matt White and Grey, with a smidgen of Barry M Black in there as well.

prairie-charms-barry-m-nail-art-spotted

On my other nails I used Barry M Black, and painted a little feather to match the bracelet using Barry M Gold Foil.  It seems I created another unintentional Barry M fest...

prairie-charms-barry-m-nail-art-spotted

I think the bracelet is really cute, and the quality seems great :)  I'm now just pondering whether or not I can start wearing jewelry to work...

I also ordered another bracelet, but I'm currently testing out the Vinylux top coat, so if my nails ever chip I shall remove my current manicure and do one for the other bracelet!  And don't forget to pop by Prairie Charms to see if there are any products that take your fancy :)


Thursday 22 August 2013

Guest Post at The Fancy Side

I may not have been posting very often recently, but I have been busy writing guest posts!  Please pop over to The Fancy Side to see the post I wrote for Amy :)

Starry Starry Nails

Hello lovelies :)

Sorry I've been a little quiet recently!  I've had these photos on my laptop ready to go for days, but motivation to write a post has been at zero.  And last night I fell asleep whilst watching Coronation Street and so went to bed at 8pm.  And I'm still tired, how does that even happen??

Tomorrow I shall be venturing into theatre for the first time to watch a sentinel node surgery.  Fingers crossed I won't faint!  Then on Saturday, HOPEFULLY, my lovely fiance should finally be home!  Fingers super super crossed!

So anyway, what am I showing you today?  Some more fab products from Born Pretty Store :)  For anyone who hasn't come across Born Pretty Store before, they sell a whole array of nail art supplies and polishes (and other cosmetics if you're so inclined) at super cheap prices.  Today I'm showing you some glittery star stickers!


This is only half the pack (it's folded over).  It is seriously huge.  We're talking about 700 stickers, in a range of sizes.  So you won't have to rebuy anytime soon!

First of all I went for an all-over starry look.


I used Barry M Grey for my base and then randomly stuck some stickers everywhere, cutting some of them in half because I think they look nice when they go off the edges :)  I will reiterate that these are stickers...not that that isn't clearly stated on the pack...but...er...  I cut out my first star, dunked it into my glass of water, and waited 10 seconds.  Tried to slide it off and it wouldn't budge.  OK, must need a little bit longer.  Stuck it back in for another 20 seconds.  Still wouldn't budge.  Hmm...this is going to take a while!  Stuck it in for another 30 seconds.  STILL wouldn't budge!  As I was trying to force the thing to slide off, I bent the paper and it popped off...  Oops, not a water decal.  Most definitely a sticker.  And very easy to peel off the paper.

The stickers sat quite happily on my nails, no sticking up or curling or the like, and I don't thin top coat dulled the glitter at all.


For my second manicure I decided to use the stickers like I like to use studs, over Barry M Matt White and Orly Miss Conduct.  I used different size stars on all my nails :)  I hadn't quite given my white polish long enough to dry here, so I couldn't press my stickers down properly, which is why the corners look slightly raised here.  Top tip: don't be impatient.

Verdict?  I think they're fab.  And they're also available in other colours if you're not a fan of pink.  You can see them here.  One sheet costs only 99 cents (65p) with free shipping to wherever you are in the world.  Don't forget, if you decide to buy these or anything else on the website, you can use the code LKL91 for 10% off.


What do you all have planned for the bank holiday (if you're in the UK!) weekend?

Tuesday 20 August 2013

Guest Post: Penny For Them

Hello ladies, today is the second guest post!  Today we have the lovely Claire from Penny For Them...  Claire has a whole array of fabulous indie swatches (try not to drool too much!), and she also posts about beauty and books!  So do pop over and check out her blog - there's something for everyone!

----------

Thank you to Sam for allowing me to do a guest post here and I hope you all like it!


It might be no surprise to those who know me or read my blog, know I’m a total nail polish addict and love to do NOTD’s. For those who don’t know me, I’m a total polish addict!!!

Today I’m sharing with you a few polishes and a charm to add a different look.


First, apologies for the poorly cut under my nail on my ring finger – blasted thing turned up the day I did my nails! Always the way….!!


OK, so, the main colour is Chanel “Bel Agus” a beautiful electric peacock blue that the sun brought to life even more and it looked amazing! Being Chanel, it went on like a dream! But doing nails outside and in the sun dries it quite quick, so this time I had to do quite thick coats so I could spread the polish without it drying too quickly. It took 2 quite thick coats.


On the ring finger I used Enchanted’s “Love Way You Lilac”. A gorgeous holo light purple that complimented the Bel Argus in a beautiful way!


 Base coat was OPI Nail Envy. 2 thickish coats of “Bel Argus”, and 3 coats of “Love the way you lilac”.
The first picture shows the polish indoors, and the second is when the sun is shining happily on them! I think the colours are amazing on their own, but together I think they complement each other warmly.

The top coat was a generous coat of Gelous to give it extra protection and add an extra shine to the mani!


To try another look I added a coat of Enchanted’s “Ice Castle” on top of the Bel Argus, and it brought it to another dimension and made it the ultimate holo colour and shimmer! I love this combination! It was easy to apply; especially using medium coats as you can see where you’ve applied it and where needs a bit extra. It didn’t dry as quickly as the Chanel, so if you needed to dip the brush again it was easy to do so.

Again, the first picture shows it indoors, and then it springing to all sorts of different shimmers when the sun hits it.


As I was sat looking at the polish, I remembered id bought some nail art items. The ones I used were just from the pound shop.


I would say the charms are a little chunky, and while they would look great for a night out or something, I wouldn’t use them as an everyday art. In the box were 2 hearts, 2 little bows with cream centre and 2 bows with the diamante style glass running along the side. I used the heart charms. What was good about these is that they can be reused. They don’t come with glue, so that needs to be added, but £1 for 6 reusable charms? Not a bad deal! They stayed stuck on to the nail and polish very well and survived a good few bumps and it looked pretty when the sun glinted off it.


So my 3 different mani’s! I loved experimenting with the different colour on the ring finger, the holo coat over the Chanel and adding the little charm on the end.

It just goes to show how many looks you can get with little amount of nail items!


Hope this wasn’t too boring or anything, and thank you to Sam for letting me guest post!


Happy Polishing!!

----------

Some very pretty polishes there :)  It's such a good idea to add toppers or charms to a manicure to revive it - then you can have a different look every day without having to repaint them!

Thank you again Claire!

Sunday 18 August 2013

Guest Post at Sincerely Stephanie!

Hello ladies :)

As the title says, today I'm doing a guest post over at Sincerely Stephanie (OMG I KNOW!!!).  I'm showing off a beautiful Pretty Serious nail polish, and a little nail art to go along with it, so please pop over and check it out :)

Saturday 17 August 2013

Gel Polish

Hello lovelies :)  I hope you've all had a good week, and have an even better weekend!

Sorry I've been a little quiet this week, I've been feeling migrainey, minus the headache (thank goodness), so I've just been totally exhausted!  My average bedtime has been like 9pm lol.  I'm feeling good now though, so I shall be back to regular posting!

I hope you enjoyed the guest post from Rachael this week :)  I have a series of guest posts coming up from some fab bloggers.  As it happens though, my fiance isn't actually home.  He was supposed to be home on Wednesday, but he's been delayed for a couple of weeks.  So now, instead of keeping you entertained while I'm spending time with my other half, all my lovely guest bloggers shall be keeping you entertained while I'm busy feeling sorry for myself!  And eating a lot of chocolate.  Oh well!

Anyhoo, since I haven't had a chance to do any nail art this week, I just wanted to share this gel manicure with you!

A couple of weekends ago I went home to Swansea.  The Saturday night we went round to my auntie's new house (it has a spiral staircase - amazing!) for an evening of nails and wine.  Do evenings get any better than that?  My auntie mentioned she still had the stuff for gels that she'd borrowed off her friend, so I decided to have a go!

gel-polish-uv

For some reason, of all the photos I took, I decided this blurry one was the most appropriate to keep...not quite sure what I was thinking there!

These were CND polishes that I used.  For those of you who haven't tried gels before, you apply a basecoat, 2 coats of colour, then a top coat.  Each coat is cured under UV light for 3 minutes (so it's quite a lengthy process!).  When you're done, it feels tacky, but you wipe it with some magic finishing stuff, and it removes the tackiness.

Application was a lot easier than I thought it would be actually.  I was expecting the polishes to be a bit thick and unmanageable, but they weren't particularly thicker than normal polishes.  Possibly I should've used thicker coats, because these were a little patchy!  And I also had a little shrinkage on the tips, despite wrapping them, so I'm not sure where I went wrong there!

I wore these for a week (they'd grown out far too much by that point to wear them any longer!).  I...er...did manage to chip them.  But only where I broke a nail, so that's pretty good going.  Honestly, I can normally chip polish within hours of wearing it.  What I REALLY loved about this was that I could to manicures on top of it of an evening for the Black & White Challenge, remove it with non-acetone remover, and I still had painted nails underneath!  Woohoo!  For that reason alone I was considering buying myself all the stuff for gel nails.

Then there was the removal.  My oh my.  I used the foil technique, and to be fair the colour came off no problem.  But there was a clear layer left (I guess the basecoat) that just did not want to budge.  In the end I had to buff it off, as I gently wept, apologising to my nails as I went!  So that has really put me off...  Other people have said they've used the soaking technique and didn't have any problem like this, but I'm not convinced soaking my hands in acetone is a good idea.  Plus, it comes in such tiny bottles...

So yeah, I probably won't be trying gels again any time soon!  I do, however, have the Vinylux topcoat to try out, and I shall be posting my thought on that soon.

One last thing...  Tomorrow will be my first ever guest post on somebody's blog :)  And just WAIT until you see which blog it is.  Aaaargh, so excited!!  I shall be posting a link here (once I work out the time difference...) so be sure to check it out!

Wednesday 14 August 2013

Guest Post: Rachos Nail Love

Hello lovelies :)

As I've probably mentioned a million times, my other half works away.  This means he's home for 6 weeks, and then away for 6 weeks.  The last few times he's been home, my blog has been completely neglected, because there's just too much darn cuddling to be done!  So, this time, I am prepared!  I've enlisted the help of some lovely bloggers to write guest posts, to keep things ticking over :)

First up is Rachael from Rachos Nail Love.  I've done a few challenges with Rachael, and she produces some fab nail art!  She's also recently posted swatches of the new OPI Minnie Mouse collection and some UK indies, so be sure to pop over and check her blog out!

----------

Hello lovely readers of Polished Art!

I am really pleased to be doing a guest post for Sam while she's away! My name is Rachael and I run another British nail blog called Rachos Nail Love.

I love reading Sam's blog, especially for her new quick nail art tutorial posts which I love trying. She always creates beautiful work with such simple colours and effects and I love reading when she tries new techniques - so I thought I would try some new nail art for you today!

So here are today's nails - Rainbow weave. I got the weave inspiration from Lucy's Stash nails that she did last year, and I've seen so many rainbow nails recently with it being summer that I felt like joining in!


These were much simpler than I expected - here's a quick rundown of how to do them:

1. Apply a base coat of white.
2. Rip off a small piece of makeup sponge and use to sponge different colours over your nails.
3. Using a small brush, paint some black diamond shapes onto your nails in a diamond pattern.
4. Join up each diamond alternately across your nails, one line above the diamonds, one below etc
5. Do the same again going up your nails
6. Top coat and clean up around your nails and you're done!

And I even attempted a tutorial for you! Hope its not too bad!


So, what do you think? They're a bit rough around the edges but its a learning curve!

Thanks again to Sam for letting me guest post for her!

Rachael xxx

----------

I'm sure you'll all agree that's a fab post from Rachael - such a pretty manicure!  If you do have a go at her manicure, do post a picture on my Facebook page for me to have a nose at :)

Thank you again Rachael!

Monday 12 August 2013

Nelly Polish: Bodmin and Beeny

Hello lovelies :)

I had a lovely day in work today.  I started my placement in Nuclear Medicine last week, so today I was sitting in on some scans going on.  All very interesting :)  And the day just goes so much quicker when I'm not just sitting at my desk trying to get reports written!

As promised, today I'm showing you a brand new UK indie brand - Nelly Polish.  International readers, there's no need to stop reading!  We all know it's been a nightmare shipping polishes from the UK since Royal Mail decided to be big old meanies and clamp down on people posting polish.  Hilary from Nelly Polish was not to be stopped though!  Instead, she created dry nail polishes.

Yep, dry.  If you're in the UK, you can of course buy the ready made stuff.  But for all you international lovelies, you can buy the dry product and then just add your own clear polish.  This isn't just a case of she send you some pigment and glitter and you essentially make your own polish; the dry mix also includes the ingredients for the suspension base.  And it's all perfectly safe and legal to ship abroad, woohoo!

On with the pretties!

The lovely Hilary sent me two polishes to share with you - Bodmin and Beeny, from her first collection 'The Fungooms', based on the children's website created by her husband (argh, how cute!).

Nelly-Polish-Bodmin-Beeny-Fungooms

As you can see, Bodmin is already made up, and Beeny was sent to me as the dried product to try out (I have plenty of cheap clear polish that I've accumulated!).

First up, Bodmin!

nelly-polish-bodmin-the-fungooms-uk-indie-dry-polish

Bodmin is a teal jelly, packed with green hex glitter of various sizes!  It's a little tealer than my camera wanted to show.  Application was great, and I used three coats here and was happy with the opacity :)  I didn't have to fish for glitters or anything and, as you can see, you get plenty of glitter on your nails!

nelly-polish-bodmin-the-fungooms-uk-indie-dry-polish

Nelly Polishes dry to a matt finish, so I used a coat of Seche Vite (as if I wouldn't have anyway...)

Next up, Beeny!  This is where the fun starts...

The dried version of Nelly Polishes come in two forms - like I have here, where it's in the bottle, metal balls and all, and you just need to add some clear polish, or in a sachet that you can add to a bottle of clear polish.  Hilary includes instructions with her polishes, but essentially...shake shake shake.

I used W7 top coat to make up this polish.

nelly-polish-beeny-the-fungooms-uk-indie-dry-polish-swatch

Beeny is quite sheer, so I used two coats over a coat of Barry M Blueberry Ice Cream.  Beeny is a slightly dusty light blue, with small and medium orange hex glitter (although I'd say they look more red).

I think it's quite an unusual colour combination, but it's really pretty.  Beeny didn't seem as packed with glitter as Bodmin, so I did have to dab a little bit to get it where I wanted.

nelly-polish-beeny-the-fungooms-uk-indie-dry-polish-swatch

I've left Beeny sit for two days now, and those glitters aren't sinking.  There has been a little separation of the clear polish from the mixture at the top (which Hilary does warn can happen with particularly thin clear polish), but a quick shake and it's good to go.

If I'm honest, I wasn't expecting too much from these polishes.  I thought the idea was absolutely BRILLIANT, but I thought you might be sacrificing on quality for the novelty of it being dried.  But not at all!  The quality is fab, and they're sooo pretty (I actually gasped when I unwrapped Bodmin).  So give these a go!  And I'm sure you've got some cheap top coats lying around that could go to better use!

There are three ways to buy Nelly Polishes:

Nelly Polish: £6.50 (UK only)
Bottled Nelly Mixture: £5
Nelly Mixture Sachet: £4

The price of indies is what generally puts me off buying them.  But you can't complain about these prices!  Pop on over to the Nelly Polish website and see if any of the colours take your fancy :)

Sunday 11 August 2013

Black & White Challenge #6: Recreate a design

It's the final post for the Black & White Nail Art Challenge!  A big thank you to Yohana from Beauty-Shoes-Nails-Fun for hosting this challenge - do be sure to pop over and check her blog out :)


for the last day of the challenge, we had to recreate someone else's manicure.  AND we got to add a colour - woohoo!  I chose to recreate Nicole from Glitter Me This' faux fur manicure, adding a hot pink twist.  Here's what I ended up with!

Black-White-Nail-Art-Challenge-6-Recreate-favourite-manicure-animal-zebra-print

I used Barry M Matt White for my base and then a black 2-way nail art pen for the zebra stripes.  If you want to have a go at zebra print but don't know where to start, don't forget I have a tutorial!

Black-White-Nail-Art-Challenge-6-Recreate-favourite-manicure-animal-zebra-print

Then I added the pink stripe and highlights on some of the stripes with a striper brush (that sentence had far too many stripes...) and Orly Miss Conduct.

So, I'm done!  And only two days late, that's probably some sort of record for me...

Next week, I'll be starting a 'Then and Now' series of posts.  I'd like you, my lovely readers, to choose which of my 'then' manicures I should recreate, so please pop over and vote here (just 'like' a picture to cast a vote!).  Thank you, lovelies!


Saturday 10 August 2013

Black & White Challenge #5: Faux Fur

The fifth challenge prompt in the Black & White Nail Art Challenge is Faux Fur!  How perfect!  Here's something I'm never going to struggle with inspiration.  I LOVE animal print nails, and possibly I'm deluding myself, but I actually think they mostly look quite classy.

Today I went with good old reliable leopard print.  I did try to push the boat out a little with my base though, and I attempted the dreaded gradient!

Black-White-Nail-Art-Challenge-5-Faux-Fur-animal-leopard-print-gradient-barry-m

You may notice I've had a slight length reduction since this morning... I quite like nubbins but it takes a bit of getting used to - they make my fingers look so big at first lol.

Anyhoo, I used (do I even need to say it?) Barry M Matt White and Black, with the Barry M Nail Art Pen in Black.  I'm really pleased with how my gradient turned out for once!  It could've done with being a bit further up my nail I think, but heck, it's the best attempt I've had yet!


Pop back tomorrow to see whose manicure I choose to recreate for the last day of the challenge!

Black & White Challenge #4: Glam or Cute

TGIS!  (We all know Saturday's better than Friday).  What are you all doing with your weekend?  I was going to wander in to town today and pick up a few things for my fiance's birthday, but I'm feeling nice and chilled out in the flat, so I'm going to be lazy and put it off until tomorrow instead!  So today I'm just going to paint my nails, read a bit...maybe clean, if I get really desperate.

Anyhoo, on with the nails!  Day 4 of the Black and White Nail Art Challenge was glam or cute.  My initial idea for this was to have black nails, with blinged up white accent nails.  I was also planning on sticking a bow on somewhere, but when I went to do that last night it turned out my bows were pink not white...whoops!

Anyhoo, it ended up being totally different to what I started off intending.  And I don't really like it, but there we go!  I'm already days behind, no time for redoing manicures lol.

Black-White-nail-art-Challenge-4-Glam-or-Cute-Barry-M

I used Barry M Matt White on all my nails, then I added Barry M Hologram to my thumb and ring finger, and added a Born Pretty Store pearl heart (because these were white!).  On my other nails, I added a coat of Barry M Black Multi Glitter, and removed with cling film.


Two more to go!  Hopefully I should have all the manicures posted this weekend!  Then maybe I should give up on challenges for a bit...

Friday 9 August 2013

Black & White Challenge #3: Freehand

Today is actually the last day of the challenge...er...but there we go!  I went home to my parents last weekend and I BOUGHT MY WEDDING DRESS so I've been a little distracted!

Anyhoo, here's my freehand manicure :)

Black-White-Nail-Art-Challenge-Day-3-Freehand-w7-salt-n-peppa-barry-m-nail-art-pen

I used W7 Salt n Pepper for my base, and added the flowers using my Barry M Nail Art Pen in Black.  It hadn't even occured to me that I didn't literally have to only use my plain black and white cremes until I saw one of the other girls use a glitter polish like this!  Silly Sam...

Here's a reminder of what else is coming up in this challenge:


And just a quick aside, I joined Twitter last week, so if you'd like to follow me my handle is @PolishedArtBlog