
----------
It might be no surprise to those who know me or read my blog, know I’m a total nail polish addict and love to do NOTD’s. For those who don’t know me, I’m a total polish addict!!!
Today I’m sharing with you a few polishes and a charm to add a different look.
First, apologies for the poorly cut under my nail on my ring finger – blasted thing turned up the day I did my nails! Always the way….!!
OK, so, the main colour is Chanel “Bel Agus” a beautiful electric peacock blue that the sun brought to life even more and it looked amazing! Being Chanel, it went on like a dream! But doing nails outside and in the sun dries it quite quick, so this time I had to do quite thick coats so I could spread the polish without it drying too quickly. It took 2 quite thick coats.
On the ring finger I used Enchanted’s “Love Way You Lilac”. A gorgeous holo light purple that complimented the Bel Argus in a beautiful way!

The first picture shows the polish indoors, and the second is when the sun is shining happily on them! I think the colours are amazing on their own, but together I think they complement each other warmly.
The top coat was a generous coat of Gelous to give it extra protection and add an extra shine to the mani!


To try another look I added a coat of Enchanted’s “Ice Castle” on top of the Bel Argus, and it brought it to another dimension and made it the ultimate holo colour and shimmer! I love this combination! It was easy to apply; especially using medium coats as you can see where you’ve applied it and where needs a bit extra. It didn’t dry as quickly as the Chanel, so if you needed to dip the brush again it was easy to do so.
Again, the first picture shows it indoors, and then it springing to all sorts of different shimmers when the sun hits it.


As I was sat looking at the polish, I remembered id bought some nail art items. The ones I used were just from the pound shop.

I would say the charms are a little chunky, and while they would look great for a night out or something, I wouldn’t use them as an everyday art. In the box were 2 hearts, 2 little bows with cream centre and 2 bows with the diamante style glass running along the side. I used the heart charms. What was good about these is that they can be reused. They don’t come with glue, so that needs to be added, but £1 for 6 reusable charms? Not a bad deal! They stayed stuck on to the nail and polish very well and survived a good few bumps and it looked pretty when the sun glinted off it.
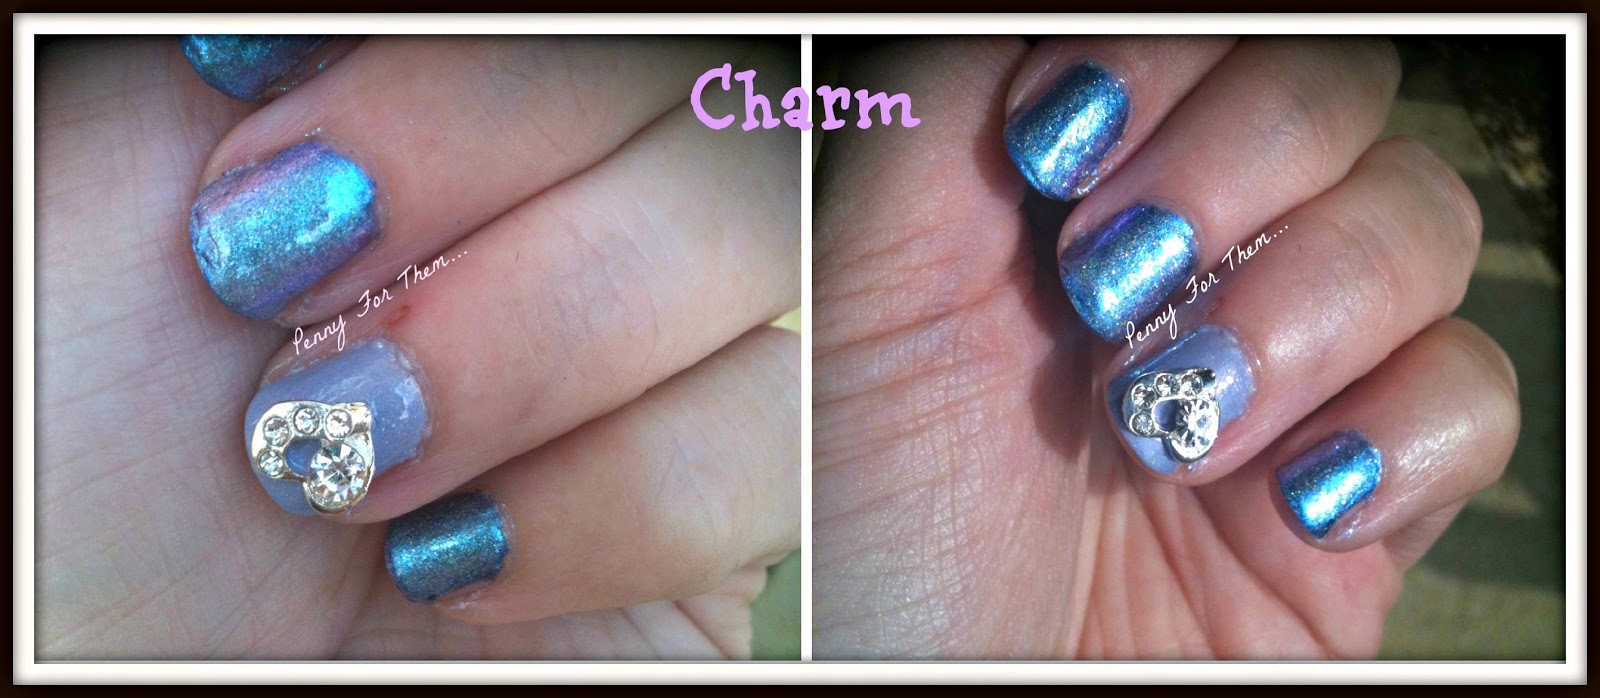
So my 3 different mani’s! I loved experimenting with the different colour on the ring finger, the holo coat over the Chanel and adding the little charm on the end.
It just goes to show how many looks you can get with little amount of nail items!
Hope this wasn’t too boring or anything, and thank you to Sam for letting me guest post!
Happy Polishing!!
----------
Some very pretty polishes there :) It's such a good idea to add toppers or charms to a manicure to revive it - then you can have a different look every day without having to repaint them!
Thank you again Claire!
The Bel Argus looks beautiful! The charms make it looks great :)
ReplyDeleteThe Bel Argus is stunning isn't it? Such a pretty shimmery manicure :)
Delete